


The Culinary Commander Top-Grain Leather | Professional Chef's Kitchen Apron | Dalstrong
Quick Overview: How to Cook Scallops the Right Way
- Make sure your scallops are patted dry.
- Add to a high quality skillet over medium heat.
- Make sure you don't crowd the pan as it can prevent the ideal browning you're looking for.
- Sear for approximately 3 minutes per side, until golden brown and cooked through.
1. Why We Love Scallops
Hot take: scallops are underrated.
Seriously, I feel like I never hear anyone talk about scallops. Even in conversations centered around seafood, you’re more likely to hear about fish, shrimp, crab, lobster, even mussels before you hear anyone bring up scallops. I’m not sure why that is, or why scallops seem to take up so little of our collective imaginations.
That is, of course, until someone (me) orders them at a restaurant. That’s when you start hearing an endless barrage of “oh wow, that looks delicious,” “oh wow, that smells so good,” “oh wow, can I try some?”. And then, of course, they all take turns helping themselves to a free sample from my plate. I’m not bitter about it.
I really think we’re long overdue for some kind of collective cultural awakening to the wonder of scallops. This incredible dish has been ignored for far too long.
So why do I love scallops so much? Well, it’s a combination of texture and flavor. When well prepared, scallops are deliciously tender, almost melting in your mouth. The taste is somewhat reminiscent of shrimp and lobster, but a bit more mellow, a bit less in-your-face. This makes them the ideal ingredient to cook along with flavors like garlic and lemon, their savory tenderness pairing beautifully with those brighter notes.
If you’ve never bitten into a nice, buttery pan-seared scallop, you’re missing out big time. And that’s another thing: they’re so easy to get right. There’s very little room for messing up when you’re cooking a food that’s so naturally delicious. So you can do all kinds of things with scallops: wrap them in bacon, pan sear them, steam them and dunk them in clarified butter… their texture really makes them ideal for a huge variety of preparations.
And yet, any time I go to a seafood restaurant, I’m the one person at the table ordering scallops. It’s so weird. I realize that seafood is full of amazing flavors and textures, but to me scallops have them all beat. And beyond ordering them at a restaurant, they’re also one of the tastiest and easiest things you can make at home.
So I’m going to share one of the best, easiest scallops recipes I’ve ever tried, in the hope that you’ll try your hand at making them at home and become another scallops devotee like myself.

2. What Are the Different Types of Scallops?
So before you learn how to cook scallops, you should learn a little more about what they are. Maybe I’m alone in this, but I went an embarrassingly long time without actually knowing what scallops were. I just knew they were tasty and paired extremely well with garlic, butter, and lemon.
The name scallops actually encompasses various types of mollusks (specifically, saltwater clams). The name is also used to describe other species that share some superficial traits, but the name is mostly used to describe the meat from these animals. According to NOAA, US wild-caught Atlantic sea scallops are an environmentally friendly choice for consumers, as they are sustainably sourced and managed responsibly.
So there are a few different types of scallops you’ll likely come across. These include wet, dry, diver, and dayboat scallops. If it sounds confusing, don’t worry; we’re here to break it down for you. Let’s start with the two main types of scallops: sea scallops and bay scallops. These are actually pretty different in terms of size, taste, and price.
Sea scallops
Sea scallops are larger than bay scallops, usually living in deeper ocean waters. They reach 1 ½ to 2 inches in diameter, whereas bay scallops are usually between ½ and ¾ inch. That’s why this type of scallop is also commonly known as king scallops, great scallops, Alaskan scallops, or jumbo scallops.
These are the best scallops when it comes to pan-searing. Because of their dimensions and texture, they can be cooked sort of like filet mignon, with the high heat creating a deliciously crusty outer layer that leaves the center tender and juicy. Of course, you can also grill, sauté, and poach sea scallops – just be careful not to overcook them, as you might dry them out.
(To avoid drying the scallops out – and continuing with the filet mignon comparison – some people turn to wrapping the outer edge of the scallops with something like bacon. Grilled bacon scallops? Come on, doesn’t that sound heavenly?)
Sea scallops are also usually more expensive and are considered more luxurious than bay scallops.
Bay scallops
Bay scallops are harvested from the shallow waters of bays and estuaries all through the east coast. They are much cheaper than sea scallops. They’re also considerably smaller than sea scallops and aren’t considered as much of a delicacy, but they still have a delicious flavor and are incredibly tender.
Bay scallops won’t be great for pan searing since they’re tiny and will become rough quite quickly. But they’re perfect for sauteing, deep frying, or serving as part of ceviche. You may also find these scallops under the name Chian scallops, calico scallops, queen scallops, Cape scallops, or Nantucket scallops.
Dayboat scallops
Aside from sea scallops and bay scallops, you’re likely to come across some scallops labeled as “diver scallops” and “dayboat scallops.” Let’s talk about what the difference is.
Dayboat scallops are more common than diver scallops. The name refers to the traditional method of obtaining scallops, where dayboats use chain drag nets to bring up scallops from the seabed floor.
Dayboat scallops are cheaper than diver scallops due to the mass-scale harvesting process. Because of this, they are also a less sustainable choice and have a higher environmental impact.
Diver scallops
Diver scallops are handpicked from the seafloor by divers. Due to this hand-selection process (as opposed to the mass-scale harvesting of dayboat scallops), they tend to be a little larger and higher quality, as divers will try to pick the biggest scallops when harvesting. This handpicking method also reduces any damage to the scallop itself.
Diver scallops are considered the more environmentally friendly, sustainable option. This is due to the fact that they are manually picked, resulting in less damage to the ocean floor as well as other species living nearby. They tend to be a little more expensive than dayboat scallops for this reason.
Wet scallops vs. Dry scallops
Aside from the options described above, you might also notice some scallops labeled as “dry scallops” and “wet scallops”. Wet scallops are soaked in a trisodium phosphate solution, which whitens their flesh and increases their weight by making them absorb liquid by as much as 30%. Yup, as you’re probably already thinking, this means you’re paying more for the water the scallop absorbs.
Not only that, but wet scallops don’t react great to pan-searing, since they will quickly start releasing the absorbed liquid. This means your scallops won’t crisp up. Wet scallops also tend to have a vaguely soapy taste.
Dry scallops aren’t processed with phosphate and might also be labeled as “chemical free” or “dry-packed.” They are the preferable option when picking out scallops.
3. How to Thaw and Prepare Scallops
If you have some frozen scallops and you want to get them ready for cooking, there’s a right and a wrong way to do it. If you want to make sure your scallops maintain all the qualities that make it an absolutely succulent dish, follow these tips on how to thaw and prepare your scallops.
- Thaw them slowly. Don’t rush it. Since scallops are small (even sea scallops) they will cook quickly. Don’t thaw them in the microwave unless you’re in the mood for some chewy, tough scallops. The microwave might cook them prematurely.
- The best way to thaw your scallops is to leave them in the refrigerator for a few hours, or overnight. This will ensure that they naturally come down to temperature. Of course, there might be occasions when you don’t have enough time to do this, in which case another good option is to put them in a strainer and run lukewarm water over them until they have thawed.
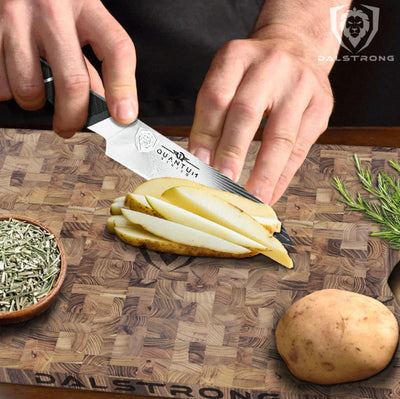
- Always always always pat your scallops dry before cooking them. This is because the moisture on the outside will prevent them from browning properly, which is definitely what you’re after if you’re looking for delicious pan-seared scallops. This applies whether you’re cooking fresh scallops or thawed frozen scallops. Use a paper towel to carefully pat them dry.
- Make sure you use enough oil and seasoning. As tender and delicious as they are, scallops are very lean, and their flavor is towards the milder side. You want to prevent them from drying out, so always use a good amount of oil or butter. And the seasoning is a great idea to give them a boost of flavor. We’ll get to that in more detail in our recipe below.
- If some of your scallops are much larger than the others, you can slice them in half. This will ensure that your large scallops don’t become tough, since it’ll allow them to cook all the way through without spending too much time on the heat.
4. How to Cook Scallops the Right Way
We’ll get to our favorite scallops recipe in a bit. Before that, we should talk about how to cook scallops correctly to avoid them drying out, becoming chewy, or otherwise wasting their potential.
How to pan-sear scallops
- Use a high-quality skillet (see some recommendations below). Put it over medium heat.
- Add 2 tablespoons of vegetable oil.
- Toss your scallops in a seasoning mix while the pan heats the oil. If you’re a fan of breaded scallops, you can toss them in a mixture of flour and seasoning.
- Place the scallops in the pan, making sure you leave about a ¼ inch of space between them. If you put them too close together, the cooking process won’t be optimal.
-
Cook them on each side for about 3 minutes. A total of 6 minutes or until you see brown around the edges, with an opaque center.
How to grill or broil scallops
The processes of grilling and broiling scallops are pretty similar, with the main difference being the cooking equipment. This step involves turning them over, so it makes sense to skewer the scallops in order to make that process easier.
- This is an optional first step, but it’s a good idea to marinate the scallops for 10 to 15 minutes in an oil-based marinade. You can use this time to cook up any vegetables you want to accompany them with.
- Remove the scallops from the marinade, making sure to save it for later use.
- Put the scallops and any other ingredients you’ve cut up on wooden skewers.
- Preheat your oven to broil, or heat up your grill to medium high. If you’re using the broiler, make sure you grease the pan. If you’re using a grill, grease the rack.
- Place the skewers on the grill or on the pan. Make sure you leave enough space in between each.
- Cook the scallops on one side for about 4 minutes, then flip them over and cook the other side for 4 more minutes. They should be nicely golden brown at this point. While you cook, brush them down with more of the marinade.
- Remove the scallops from the heat once they are nicely browned.
5. Best Scallops Recipe
Okay, now you know the best way to cook scallops. Now here’s our long-promised lemon garlic scallops recipe.
This super simple recipe makes the most of the tender, buttery texture and mild flavor of the scallops by paring them with the bright notes of lemon and garlic, resulting in a very easy, breezy dish that tastes like something that takes considerably more skill to make.
Ingredients
- 2 tablespoons Olive oil
- 1 ¼ pounds Scallops
- 3 tablespoons Unsalted butter
- 4-5 (or 1 ½ tablespoons minced garlic) Garlic cloves
- ¼ cup Dry white wine or broth
- 2 tablespoons Lemon juice
- ¼ cup Chopped parsley
- Salt and freshly ground black pepper to taste
Instructions
- Make sure your scallops are thawed and ready to cook. Pat them dry with paper towels.
- Heat some oil in a large pan or skillet over medium high heat until it’s sizzling.
- Add your scallops in a single layer. Don’t overcrowd the pan! If you need to work in batches, do so. Crowding the pan will prevent the perfect sear you’re looking for.
- Season the scallops with salt and pepper to taste, frying them for 3 minutes per side. Once a golden crust has formed underneath, flip them and fry them again for 3 more minutes or until they’re crisp, lightly browned, and cooked through (opaque).
- Remove the scallops from a skillet and transfer them to a plate.
- In the same pan, melt 2 tablespoons of butter. Scrape up any browned bits that might have been left behind from the scallops. Add in your garlic and cook with the butter until fragrant.
- Pour in your wine or broth. Bring the mix to a simmer for 2 minutes until the liquid has reduced by half. Stir in the remaining tablespoon of butter and lemon juice.
- Remove the pan from the heat. Add the scallops back into the pan so that they’re warmed through.
- Boom. Your delicious lemon garlic scallops are done. Serve them over rice, pasta, bread, or vegetables.
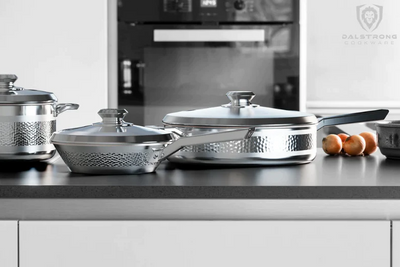
6. Best Tools for Cooking Scallops
If you want the ultimate crunchy-outside, tender-inside seared scallops, you need to make sure you’re using the right tools. So here’s a list of the very best pieces of cookware available in the market for you to make the ultimate scallops.
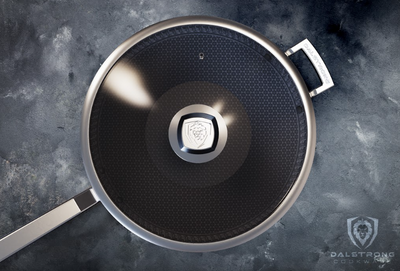
1. 10" Frying Pan & Skillet | ETERNA Non-Stick | Oberon Series | Dalstrong ©

This awesome 10” frying pan is pure quality at an incredible price. It’s 3-ply aluminum cladded for ideal conductivity, allowing you to quickly heat up and make sure you get the perfect sear on those delicious scallops. Not only that, but it features a non-stick Eterna coating, an innovative non-stick technology that maintains its non-stick properties much longer than traditional non-stick surfaces. An amazing tool for an unbeatable price.
PROS:
- 3-ply aluminum cladding with additional fused thick gauge layers of nonreactive 18/10 stainless steel for perfect browning and braising.
- Powerful, sturdy, and most importantly: durable. This piece of cookware is built to last a lifetime.
- Eterna non-stick coating has been tested to last 26 times longer than the leading competitor brand, and over 10 times longer than other premium non-stick brands.
- Visually attractive, eye-catching design.
CONS:
- 10” is a pretty good size for a frying pan, but if you’re looking for a slightly larger cooking tool, check out some of the other options listed below.
- While its look is classic and understated, some home cooks might be looking for a bit of added flair. In that case, check out the option with the hammered finish below.
2. 10" Frying Pan & Skillet | Hammered Finish Black | Avalon Series | Dalstrong ©

The ultimate 10” frying pan. This stunning piece of cookware from Dalstrong’s Avalon series is the perfect marriage of function and form, featuring a top-quality 5-ply copper forged foundation layer and thick gauge layers of nonreactive 18/10 stainless steel. You’ll be able to put color on those scallops, as well as sear, brown, sauté, fry, and even bake all manner of proteins, sauces, and more.
PROS:
- A powerful, versatile kitchen tool that can be used for all manner of kitchen tasks.
- Oven and broiler safe up to 600 degrees F; also freezer, dishwasher, and refrigerator safe.
- Premium conductivity that heats 5 times better than iron and 20 times better than stainless steel,
- Beautiful mirror-polished exterior, features an elegant hammered finish for added class and distinction.
CONS:
- This gorgeous piece of cookware may not be to everyone’s taste due to its hammered finish and all-black look. We have some more traditional-looking options in this list.
- This 10” frying pan is a premium product that’s a little more expensive than the previous option. If you’re looking for something a bit more budget-conscious, check out the 10” frying pan from the Oberon series listed above.
3. 12" Frying Pan & Skillet | ETERNA Non-stick | Oberon Series | Dalstrong ©

If you’re looking to cook bigger batches, or you simply prefer to have a little additional space to play around with, this 12” frying pan kicks things up a notch. Wonderful heat conductivity and responsiveness at an incredible price point. Also featuring the Eterna non-stick coating, this powerful kitchen tool will make quick work of any task you throw its way.
PROS:
- Top-of-the-line materials at an affordable price point; this makes an ideal gift for the cooking enthusiast in your life.
- 3-ply aluminum core and thick layers of stainless steel will ensure that this cookware lasts you a long, long time.
- Has ultra-strong 2.5mm thickness, making this truly heavy gauge cookware. It won’t dent or warp under prolonged heat.
- Has the world’s longest-lasting PFOA and APEO-free non-stick coating.
CONS:
- If you’re not going to be cooking large batches, maybe 12” is a little too large for you. The 10” frying pans listed above are better suited for smaller batches.
- The handle on this pan is metal with a square profile and a closed end, while some home cooks might prefer open ends.
4. 12" Frying Pan Wok | ETERNA Non-stick | Oberon Series | Dalstrong ©

Wok pans are powerful, sturdy, and so fun to cook in. They also have excellent heat distribution and give you a lot of control in terms of handling your food during cooking. This is a fantastic example of a modern non-stick wok: a high-performing, medium-weight, super functional cookware.
PROS:
- 3-ply aluminum core with additional thick gauges of stainless steel.
- Has a brushed finish induction bottom for enhanced grip, making it ideal for smooth top electric ranges, gas stoves, and induction cooktops.
- Comes with a thick, extra-strong 4mm tempered glass lid which will give you easy visibility into the entire cooking process.
- The Eterna non-stick coating maintains its non stick properties for much, much longer than other non stick brands.
CONS:
- If you’re not used to the wok shape, it might take you a little longer to get used to this tool.
- Yep, this is a non-stick wok pan. It marries all the advantages of a wok with the convenience of non-stick. However, some traditionalists may scoff at that. If that’s you, this might not be the tool for you.
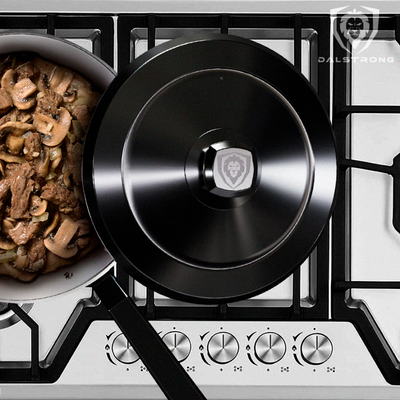
5. 12" Sauté Frying Pan | Hammered Finish Black | Avalon Series | Dalstrong ©

Sauteed scallops are delicious, and this 12” sauté frying pan is one of the greatest pieces of cookware you’ll find. First of all, look at it – it’s absolutely gorgeous, with a black hammered finish that communicates both elegance and ruggedness. Secondly, the frying pan was painstakingly engineered for optimum heat retention and conductivity. It’s a powerful, versatile tool that has the added advantage of being absolutely beautiful. What else could you need?
PROS:
- Wonderful responsiveness to the smallest changes in temperatures, giving you even more control to make sure your dishes turn out exactly how you want them.
- Perfectly angled handle for a comfortable and secure cooking grip.
- Comes with a stainless steel lid that will last a lifetime and maintain a perfect seal.
- Truly heavy gauge cookware, with a thickness of 2.5mm, ensuring it won’t dent or warp under prolonged heat.
CONS:
- This absolutely gorgeous, top-of-the-line cookware is an investment. While it is considerably more affordable than other similar quality tools in the market, it’s still the most expensive item in this list.
- 12 inches might be a little large for some home cooks.
7. Frequently Asked Questions
How should scallops be cooked?
Scallops can be cooked a number of ways; our preferred method is pan-searing, but you can also broil them, grill them, or even deep-fry them.
How long should scallops be cooked for?
While cooking times will vary depending on the size of the scallops and other factors, it will usually take between 5 and 7 minutes to fully cook scallops. With prep time, you’re looking at a total of 10 minutes or so.
How long does it take to pan fry scallops?
The recommendation is to cook scallops for no more than 3 minutes per side or until they are lightly browned and cooked through (opaque).