


How to Cook Corn on the Cob in the Oven
- Preheat the oven to 350 F.
- Peel off the corn husk and corn silk.
- Mix seasoning (garlic, fresh herbs etc.) with butter in a bowl.
- Cover the corn in your butter mixture.
- Wrap corn in aluminum foil and place it on a baking sheet.
- Roast the corn for 25-35 minutes.
- Unwrap and slather with toppings of your choice.
Summer time calls for endless bbqs and lots of roast corn. From a corn salad to side dishes to street corn that makes our mouth water, we can’t get enough of a roasted corn on the cob. While I personally prefer my corn grilled on an old school barbecue (like the ones in these tattoos) there are stellar ways to grill up corn that don’t involve owning any type of grill. Home cooks looking for easy dinners to make, look no further.
Content Table
- The History of Corn on the Cob
- Tools You’ll Need
- How to Cook Corn on the Cob in the Oven
- Toppings/Seasoning Ideas
- How to Store Your Cooked Corn on the Cob
- Variations on the Recipe
- Is Corn on the Cob Healthy?
- Frequently Asked Questions About Corn on the Cob
If you’ve ever run out of propane with a couple of steaks and a full basket of freshly peeled corn on the cob you know a thing or two about improvising beyond a recipe. Turns out there are many alternatives to the classic barbecued corn on the cob. While we are huge fans of grilled corn, boiled corn, heck even reheated frozen corn, a good roast corn out of the oven is mouth wateringly delicious.
Learn a bit about the history of corn, what exactly you need to make the ideal easy oven roasted corn, and let us walk you through the recipe step by step. We’ll also offer up some ways to spice up your corn and variations in case you don’t have the exact ingredients on hand. We’ll cover serving, storage, and answer some questions about the beloved corn on the cob.
1. History of Corn on the Cob

Fresh sweet corn has a long history of feeding ancient civilizations. Fossils of corn have been found in Mexico that place corn as a main source of diets as far back as between 10,000 to 6,000 years ago. Needless to say, we’ve been enjoying our fresh corn on the cob for centuries.
Back in the day though, the corn cobs were much, much smaller (only about 2cm long!). They were used in a variety of dishes and became a staple. I’d venture to guess, however, that these corn recipes probably weren’t served at fancy restaurants with a variety of chili butter, or garlic salt concoctions.
While ancient civilizations used them as supplements to their diets, the ability to domesticate and grow large acres of corn has changed our food systems vastly. Nowadays the average person eats 25 pounds of corn per year! If you’re going to eat it all the time you might as well learn how to make some delicious corn. So follow along because we’ve got just the way to perfect an oven roasted corn feast.
2. Tools You’ll Need
First things first, any master chef knows that you must have the proper materials in order to execute any recipe well. Gather your kitchen supplies before you take those ingredients out.
- Apron: As always you’ll want to start out by making sure you have a trusty apron on hand. You’ll be working with a lot of butter with this recipe and hot butter has a tendency of getting all over your hands and then all over your shirt. I personally recommend this all leather one as it’s an absolute beast of an apron that protects at all costs.
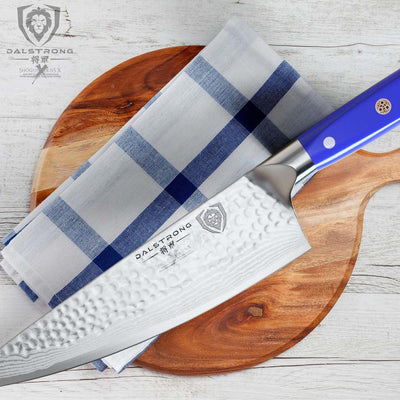
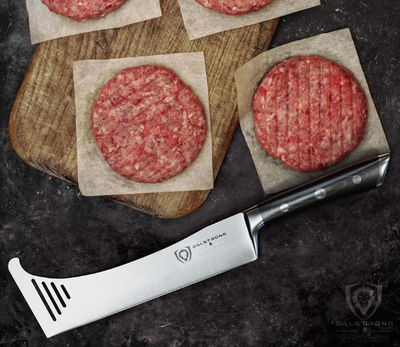
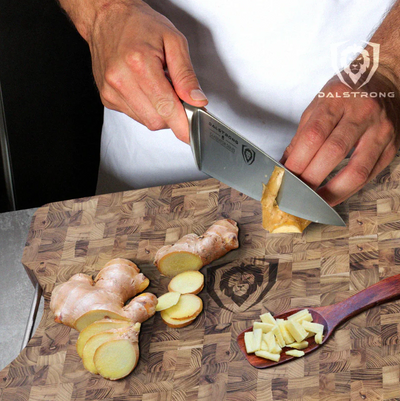
- An ultra sharp chef’s knife: If you don’t have a chef’s knife on hand (I love this one) a paring knife will do, but this is vital if you want to have fresh herbs in your butter or minced garlic, which trust us you do.
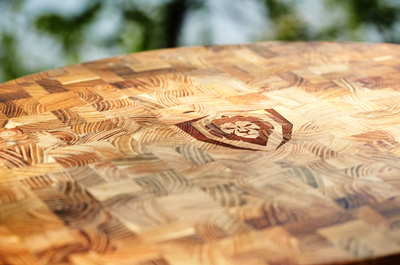
- A cutting board: You’ll need a cutting board, obviously, if you want to slice and dice all those delicious butter toppings. I absolutely love the size of this sleek black board.
- One small bowl: You’ll need a bowl to combine that butter and herbs/spices.
- A baking sheet: Since we’re roasting the corn on the cob in the oven it’s vital we have a good baking sheet (or baking dish) on hand.
- Aluminum foil: You’ll need some good, large pieces of aluminum foil to wrap the corn, but if you’re fresh out of foil parchment paper will do in a pinch.
3. How to Cook Corn on the Cob in the Oven

This oven roasted corn recipe is easy to make and easy to adapt. Use it as you use any and all recipes, as a guiding start that you can then adapt to make your own!
|
Prep Time |
10 minutes |
|
Cook Time |
25-35 |
|
Serving Size |
4 |
Ingredients:
While this easy recipe serves 4, it’s super simple to double or triple the recipe if you’re throwing a large party and need more oven roasted corn!
|
4 ears of huskless corn on the cob |
|
2 cloves of garlic, minced or diced |
|
¼ cup of softened butter |
|
1 teaspoon of fresh thyme |
|
1 teaspoon of parsley |
|
Salt and pepper to taste |
Step one of any recipe is absolutely always to preheat the oven so that by the time your food is prepped you can pop it right in. Different oven roasted corn recipes will say roast at 400, but I find that a lower temp for a bit longer is always better than an uneven cook.
Set your oven to 350 to preheat and if need be you can always put the corn on broil for a few minutes before serving.
Peel off the corn husk and corn silk.
While you can most definitely find a recipe that allows you to keep the corn husks on and roast, I find that to be entirely messier than removing them before cooking. Peel off the corn in the husk and try to remove as much of the corn silk as possible.
If you’d like to rinse them afterwards feel free, but the corn husk does a pretty good job of protecting our corn kernel so we can have fresh oven roasted corn.
Mix seasoning (garlic, fresh herbs etc.) with butter in a bowl.
Baked corn is nothing without its herb butter mix. This is your chance to really make your fresh corn shine. It’s easier to use softened butter while mixing so if you haven’t left your butter out to get to room temperature, microwave that butter for 20 seconds or so until it becomes soft, but not quite to the point of melted butter.
There is a heated debate in most butter communities about whether unsalted butter or salted butter is best. I say use whatever you have! But do make sure that if you’re going with the salted butter option, you account for that in terms of the saltiness of your butter mixture.
For this recipe I recommend chopping up some fresh thyme and fresh parsley, but really any fresh herb you want to add will be a delightful addition to your butter. In terms of measurements these are quite loosely based. Do some taste testing to find what works best for you. I am a huge fan of thyme so I always add a little extra, but if you’re a rosemary fan throw that in there and get wild.
If you don’t have an herb garden, don’t sweat it. Just think about adding some seasoning into your butter and have fun with it. Smoked paprika is a fan favorite, along with the classic black pepper addition.
Whatever you add though, make sure it includes garlic for that extra hint of flavor. I suggest mincing 2 cloves of fresh garlic, but garlic powder is sufficient in the event that you don’t have any fresh garlic on hand.
Then mix the herbs, seasoning, garlic, and butter all together in a bowl to have a delicious seasoned butter concoction.
Cover the corn in your butter mixture.
Lather generously that garlic butter all over each piece of corn and make sure none of that flavored butter deliciousness goes to waste.
Wrap corn in aluminum foil and place on a baking sheet.
Wrap each ear of corn in aluminum foil so that the corn is completely covered. Then place your buttered, wrapped corn on a baking sheet or baking pan. You can also place your corn in a skillet and throw that corn in the oven if need be!
Roast the corn for 25-35 minutes.
Place it in the preheated oven and set your timer for 25 minutes. At the 25 minute mark if the corn looks fully roasted you can go ahead and take it out. I like mine to be a bit charred so I usually open the foil up at the 25 minute mark and then put it back in the oven to roast for another 5-10 minutes to crisp it up.
Unwrap and slather with toppings of your choice.
Now’s the time to make that delicious corn even fancier. Take this opportunity to add some more fresh herbs, or throw on some parmesan cheese or a hint of paprika. If you want to be really wild you can try adding bacon bits to that sweet corn, or even just a dash of salt and pepper.
4. Topping/Seasoning Ideas

In every single recipe, I find that the more garlic butter you add, the better. Also, the more seasonings you add, the better, but that’s strictly my opinion. Adding a topping to your ovenroasted corn on the cob is entirely up to you. Try to think about what else you’re having in the meal and try to choose complimentary flavors.
For example, if you’re cooking corn with a protein like chicken, those fresh thyme and rosemary flavors along with some parmesan cheese will work well.
If you’re having corn as a side to tacos, add some cotija cheese and a whole lot of smoked paprika to this recipe for a delicious addition. The following are a few suggestions but really the possibilities are endless!
|
Black Pepper, White Pepper, or Red Pepper |
|
Salt |
|
Fresh Garlic/Garlic Powder/Garlic Salt |
|
Paprika/Smoked Paprika |
|
Chili Powder |
|
Parmesan Cheese |
|
Cotija Cheese |
|
Feta Cheese |
|
Bacon |
|
Sour Cream |
|
Fresh herbs: parsley, rosemary, thyme, oregano, cilantro, basil! |
|
Butter, butter, and more butter |
5. How to Store Your Cooked Corn on the Cob
Now that you’ve completed the most delicious garlic butter herb roasted corn recipe you’ll want to savor every last bite. Chances are you won’t have leftovers but in the event that you do store the cooked corn in an air tight sealed container or plastic bag. You can also use aluminum foil or saran wrap to keep air out.
6. Variations

There are a number of variations that you can make to reduce the calories in this cob recipe and almost all of those have to do with the garlic butter. Butter is great for the soul, but not as good for the body. Try using olive oil (don’t actually do it, I’ll be so sad) instead of butter for a vegan, health friendly option.
As mentioned earlier, there are also a ton of variations for how you want to spice your corn on the cob. While this recipe calls for fresh herbs, cooking is all about variety so I never try the same herb combination twice. Add paprika, hell add some curry, or throw some cumin on there and see what happens!
It is nice to add some cheese to the final product not only for presentation but to diversify the flavors, but if you’re vegan or dairy free substitute that for a vegan nut cheese alternative and I’m sure it will be delicious.
7. Is Corn on the Cob Healthy?
While corn in general is not the most nutrition rich vegetable, it’s a great addition to a meal if you have supplementary vegetables and proteins. The following shows you the nutritional value of corn on the cob that has been oven roasted.
Nutritional Information
|
Calories |
245kcal (12%) |
|
Carbohydrates |
42g (14%) |
|
Protein |
7g (14%) |
|
Fat |
9g (14%) |
|
Saturated Fat |
2g (13%) |
|
Sodium |
100mg (4%) |
|
Potassium |
618mg (18%) |
|
Fiber |
5g (21%) |
|
Sugar |
14g (16%) |
|
Vitamin A |
879IU (18%) |
|
Vitamin C |
16mg (19%) |
|
Calcium |
5mg (1%) |
|
Iron |
1mg (6%) |
8. Frequently Asked Questions

How do you know when corn is done in the oven?
The kernels will be plump, likely bright yellow (but this depends on what type of corn you buy), and will look like they’ve been steamed or boiled. If you’re unsure, feel free to leave it in the oven for a bit longer, or set the oven to broil and wait until you see a light char.
How long does it take to cook a cob of corn?
For this roasted corn recipe I gave a range of 25-35 minutes. Some people like to blacken their corn slightly (by some people I mean me), but others don’t! Depending on your oven and the size of the cob after 25 minutes (with your oven at 350 F) the corn should be cooked through, but you can always leave it in for a bit longer or take it out early depending on how it looks.
What is the healthiest way to cook corn on the cob?
Without butter is the sad answer, but man corn on the cob is nothing without that delicious butter. The good news though is that roasted corn is more nutritional than boiled corn because of the way it loses folic acids during boil.
Written by Monique NicholasBased in Vancouver, Monique enjoys jumping into bodies of water, sending postcards, and adding lemon to every single one of her dishes.